Unreal tutorials
Tutorials for Unreal Engine 4
Friday, June 10, 2016
The first update for my Old Streetlight pack, is available!
The update included two new lightsource.
https://www.unrealengine.com/marketplace/old-streetlights-pack
Tuesday, May 10, 2016
My own Blueprint based streetlight pack is available in the Unreal Engine marketplace.
Preview: https://youtu.be/pPeQU2YzuUo
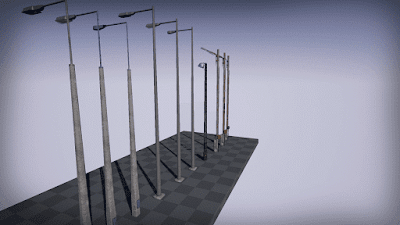
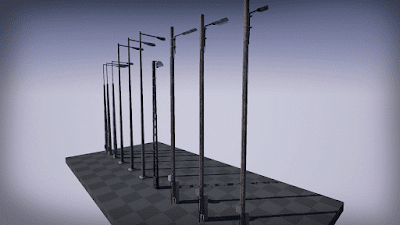
Includes:
• (10) mesh
• (10) Blueprint
• (5) materials
• (8) material instance
Texture Sizes:
• (15) 1024*1024 texture
• (2) 1024*2048 texture
• (22) 2048*2048 texture
Tricount: LOD0: 4300-1200, LOD1: 3200-900, LOD2: 2300-800
Physically-Based Rendering: Yes
PBR Albedo, Normal, AO, Roughness Maps.
LODs, Collisions, Lightmaps, and simple Blueprints included.
Recommended Lightmap resolution: 256(for ironpole based lamps: 512)
All model have four 2K base texture(Diffuse, normal, glossiness, metal)
All models can light
If you like it go to marketplace.
Lighting without extra textures, and materials. Part II. The Blueprint
In the previous part I showed how to add an luminous bulb to the streetlight mesh. Now, we look how to create a switchable streetlight with blueprint. To minimize system requirement we use only static lighting.
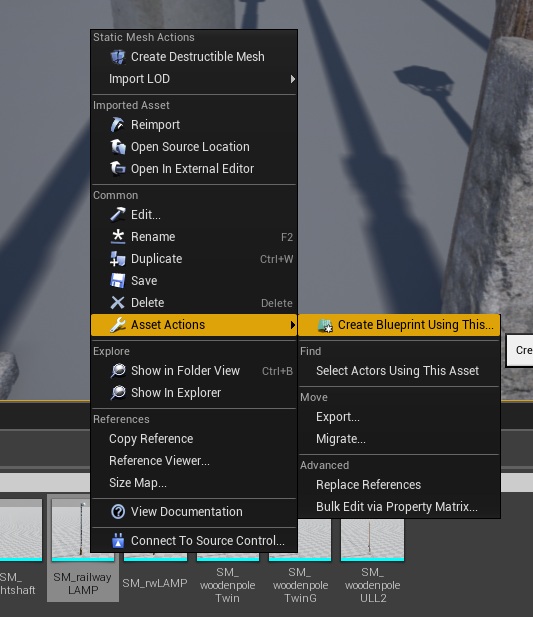 |
The first ting is, select the mesh what you want to create a streetlight, press left click, select Asset Actions, and press right click on the Create Blueprint Using This... option.
|
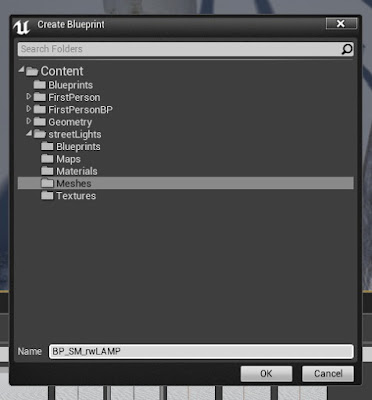 |
In the popup windows select the folder what you want, and add a name for the Blueprint.
|
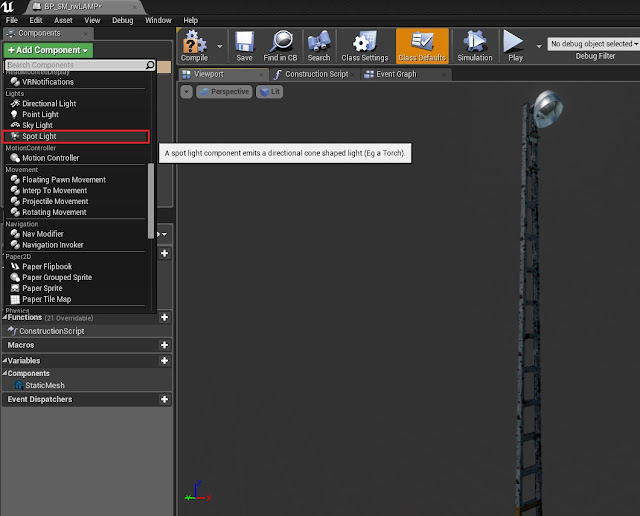 |
Now, open the Blueprint(Automatically open), click the Add Component menu, and select Spotlight.
|
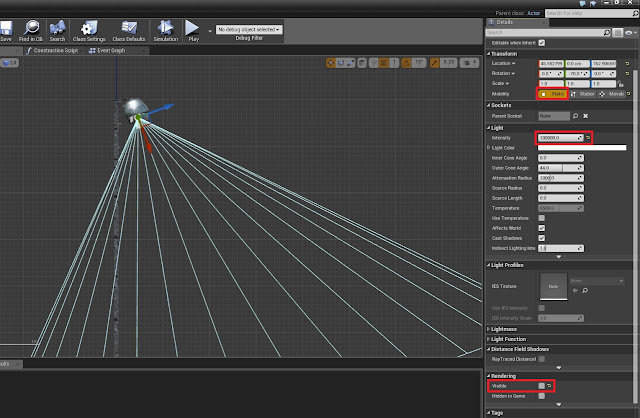 |
Move and rotate the spotlight close to the bulb. Set mobility to static, intensity to 100 000, and visibility to false(important to the continue)
|
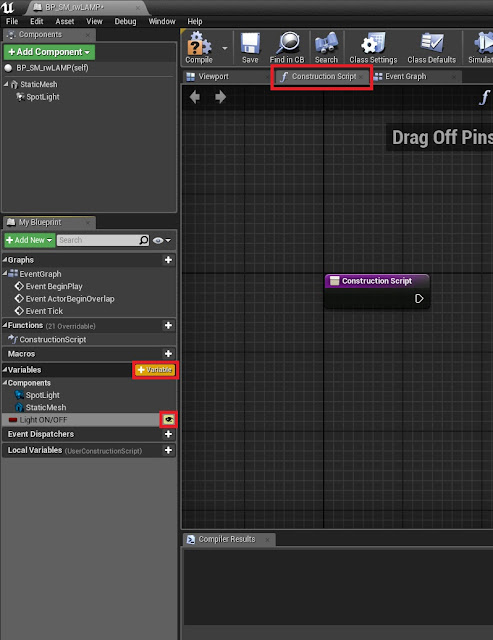 |
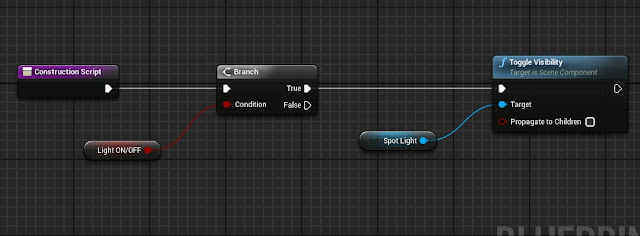
Go to Construction Script tab. Add a new Boolean variable(important! Not local variable) and set to public(eye icon)
|
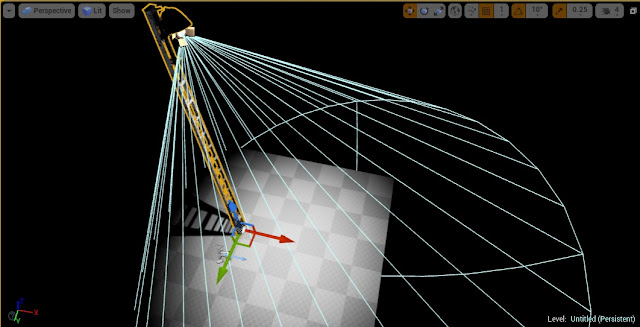 |
Create a new map, add the Blueprint to it, and mark the switch variable on the Details panel(Right side)
|
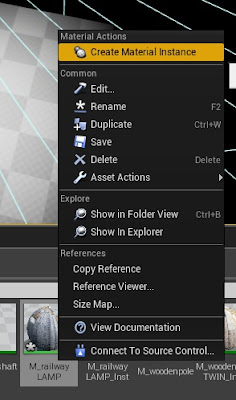 |
Now, go to material, press a left click, and select create material instance.
|
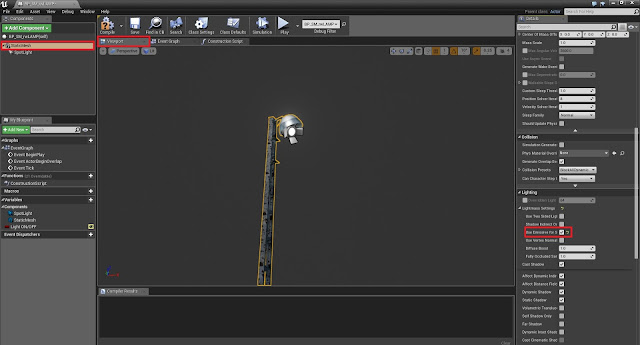 |
Now, go back to Blueprint editor, select viewport tab, select the streetlight mesh, go to Details panel Lighting section, and mark Use emissive for static lighting checkbook.
|
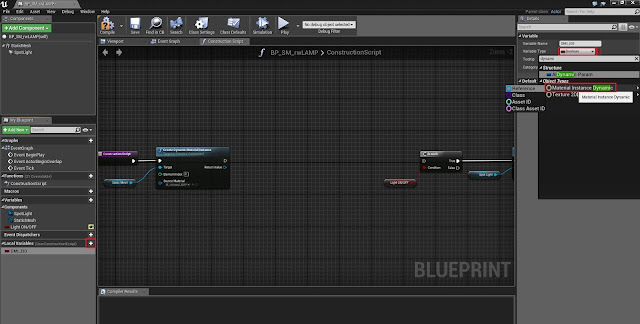 |
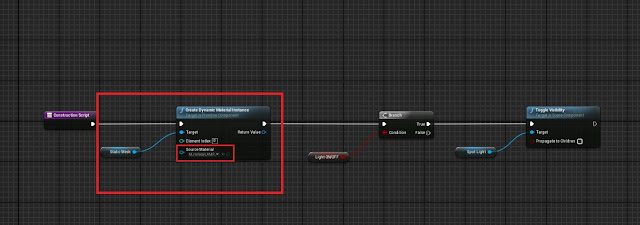
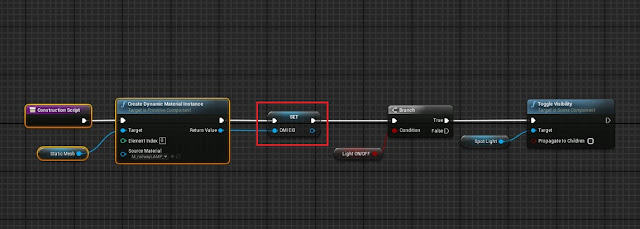
Add a local variable, and set type to Material Instance Dynamic.
|
 | |
|
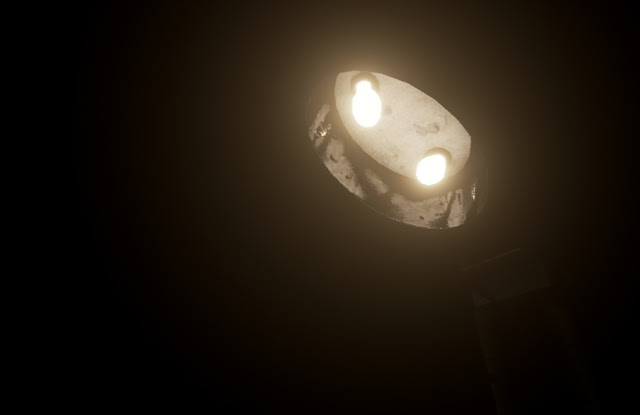 |
| If you follow my instruction, you get same result. |
Sunday, May 8, 2016
Lighting without extra textures, and materials. Part I.
This description alone is not enough for the lighting. It makes only an emission, and add glow. To get a usable streetlight please read the second part of this Blog Entry.
 |
| The first ting is, You must create a UV channel, and move The UV islands of the bulb in to the corner(for example: upper right corner) |
 |
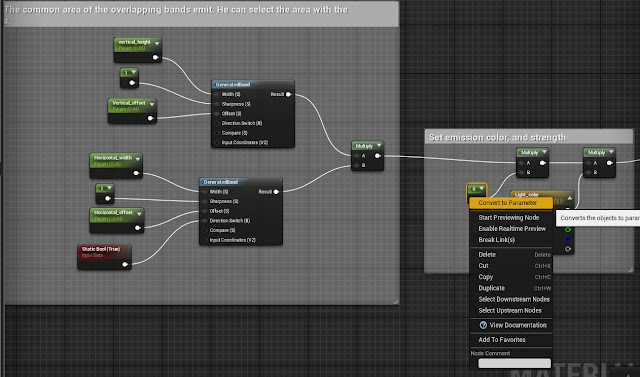
| You must add a GenerateBand node to the material. It create a line onto the texture from its constants. |
 |
| Repeat the previous step, and add a Boolean constant to the direction switch parameter of the second GenerateBand node. |
 |
| Add a multiply node, to get the common area of the two GenerateBand node. This area covering the UV islands of the bulb. |
 |
| Quite poorly lit. |
 |
| To increase lighting strength, and set lighting color, you must add two multiply node. For usable lighting set the constant between 20-300. |
 |
| The end result. |
Subscribe to:
Comments (Atom)

